Pages

Showing posts with label cardmaking ideas. Show all posts

Saturday, 24 September 2022

Get Whale Soon!


Hello Teatimer's I have another Whale card for you today. This time its a sweet Get Whale Soon card, for which I went for a bright and colourful colour scheme. 
I began by cutting out the largest frame from the Metric Layering Frame Dies three times so I had one for the base layer and the other two I cut out the sand bottom and the waves. I ink blended these with distress oxides and layered them altogether. 
For my images I combined the Get Whale Soon stamp set with an older discontinued mermaid set. You could use the weed from Fintastic Friends too though if you have that. I coloured those up with Copic markers and added some finishing touches using Black and White Gelly Roll pens. 
I also heat embossed the sentiment onto black card and cut that out with the coordinating dies. I love that Time for Tea stamps have the coordinating dies to cut out the sentiments too. It just adds something extra to your card. 
After adding adhering everything together I added some birds in the top left corner and some pink dots using a gelly roll pen and that was my card finished up for today. 
I hope you like it and be sure to check back for some more inspiration from the design team. 
Also a nice added bonus if you want to purchase anything in the Time for Tea Shop you can get 10% off your order using code T4TNATALIE10. 


Saturday, 10 September 2022

Here's the Scoop!


Happy Saturday Teatimer’s hope it’s been a good week. I love the Autumn weather that's hitting us this week but I am really missing those hot summer days that are perfect for ice cream at the beach. These cute critters from the Cool Critters Stamp Set have to be one of my favourite Time for Tea stamp sets.  I have quite a few other cards for inspiration with them on my Instagram page. 


I began by cutting out the largest rectangle from the Layering Dies Metric Size to create my base which I inked up with distress oxide inks. I cut out two more rectangles which I used to cut out the waves and the beach again inking them up with distress oxides. 
For the clouds I used the Cloud Dies and layered over velum to give them a softer look. 
Then stamped and coloured up my images, I used COPIC colours to colour up my images. Then added some extra details for the cheeks and noses using a black and a white gelly roll pen. 
Once everything was cut and coloured I layered everything up on my card base. Finishing up with some dotted details randomly on my card with coloured gelly roll pens. 
I hope you like my card and if you want to get any of the products in the Time for Tea Shop you can get 10% off using code T4TNATALIE10 . Have a great weekend and don't forget to check back soon for more inspiration from the rest of the team. 


Saturday, 13 August 2022

Congratulations, Well Done!


Happy Saturday Teatimer's I've got a fun whale card today for you using the new Time for Tea release. 
As you probably know I love to make scene cards and the Stitched Slimline Slopes Die is perfect for this. 
I used an ombre technique with Distress Oxides to create darker water at the bottom and then lighter towards the top where it hits the sky. Then for the sky I blended the sky and then stencilled some sun rays over the top. I finished it up with some spritzes of water and splatters of the same colours and coloured up some fish using an orange gelly roll pen. I also drew in some birds in the sky too to add some extra interest.
The whales and narwhal are from the new Get Whale Soon Stamp and Die set  I coloured them up in a range of colours for more contrast and a pop of colour. Then all that was left to do was the sentiments which I white heat embossed onto black using the Simple Sentiments Clear Stamp Set.
That's my card finished up I hope you like it you can fund all the products in the Time for Tea Shop and you can get 10% off your purchases using code T4TNATALIE10
Have a great weekend and be sure to keep checking back for more inspiration. 
 

Saturday, 28 May 2022

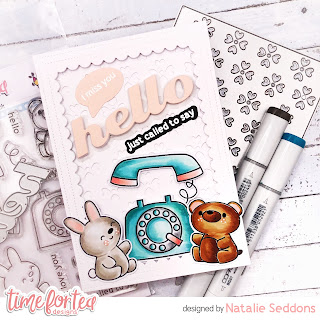
Hello, I Miss You!


Happy Saturday Teatimer’s these weekends are coming around fast! Have you been doing lots of crafting this week? I’ve been busy creating once again, using the super cute new release. This week I thought I’d better colour up something else besides those adorable kitties, so these cuties are from the new Let's Chat Stamp and Die set. 
I stamped them out using memento Tuxedo Black ink and coloured them up with copic markers. Cutting them out with their coordinating dies and adding some finishing touches to their cheeks and noses using black and white gelly roll pens. 
For the background I used the Flirty Flowers Cover Dies which I cut out of white card and layered on top of a white card base. I added a white frame using the Smile Inverted Scallop Frame Dies and popped it up using some white foam tape. 
The big Hello sentiment is from the Hey, Hello, Hi Dies set which I cut out of fun foam as well as the pink paper so it would be the same height as the frame and it's so much easier than faffing with the foam tape. 
I love how the Time for Tea Coordinating Die Sets cut out the sentiments too so I heat embossed my other sentiment onto black card and cut that out using the Coordinating Dies. For the other sentiment I cut out one of the speech bubbles from the Speech Bubbles Coordinating Die Set and heat embossed the I Miss You inside it. Top tip it's easier to stamp and then cut out. I laid these two sentiments flat so that it was the hello die that was popped up alongside the cute Critters and the telephone. This just adds a bit more dimension and interest to your card. 
It really was a quick card to make with nit much colouring and perfect for sending to someone to give them a pick me up!
I hope you like it and if you want to pick any of the items up in the Time for Tea Shop,you can get 10% off your order using code T4TNATALIE10 ♡ 

Saturday, 21 May 2022

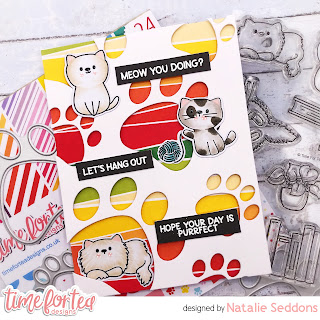
Meow You Doing!

 Hi everyone it's DT member Natalie here with another sweet kitty card. I just couldn't resist colouring them up again they are just so fun! I teamed the kitties with the new Pawsome Dies and Pawsome Rainbows Paper Pad. 

I began by cutting out a base out of white card by using the Imperial size Layering Dies and then taking the Pawsome Dies, I randomly cut out paw prints around the card. I used the biggest one at the bottom and got smaller as I went up as I thought it was more aesthetically pleasing. This was then popped over the top of a sheet of the Pawsome Rainbow Papers using foam tape to add a bit of depth. 
The cats I stamped from the Puurfect Day and the Hey There Critters Stamp and Die Sets. I used Mememto Tuxedo Black ink to stamp and coloured them up with COPIC markers and cut them out with the coordinating dies. Using some black and white Gelly Roll pens I also added some finishing touches on their noses and cheeks and adhered them onto the card. 
For the sentiment I white heat embossed onto black card and cut them out into strips and laid one next to each kitty. Then just popped it all onto my card base and that was my card all finished up. 
I hope you like the finished result you can find all the items in the Time for Tea Shop and if you want to purchase anything there you can get 10% off your order using code T4TNATALIE10T4TNATALIE10. Have a great weekend and I’ll see you next week ❤️

Saturday, 14 May 2022

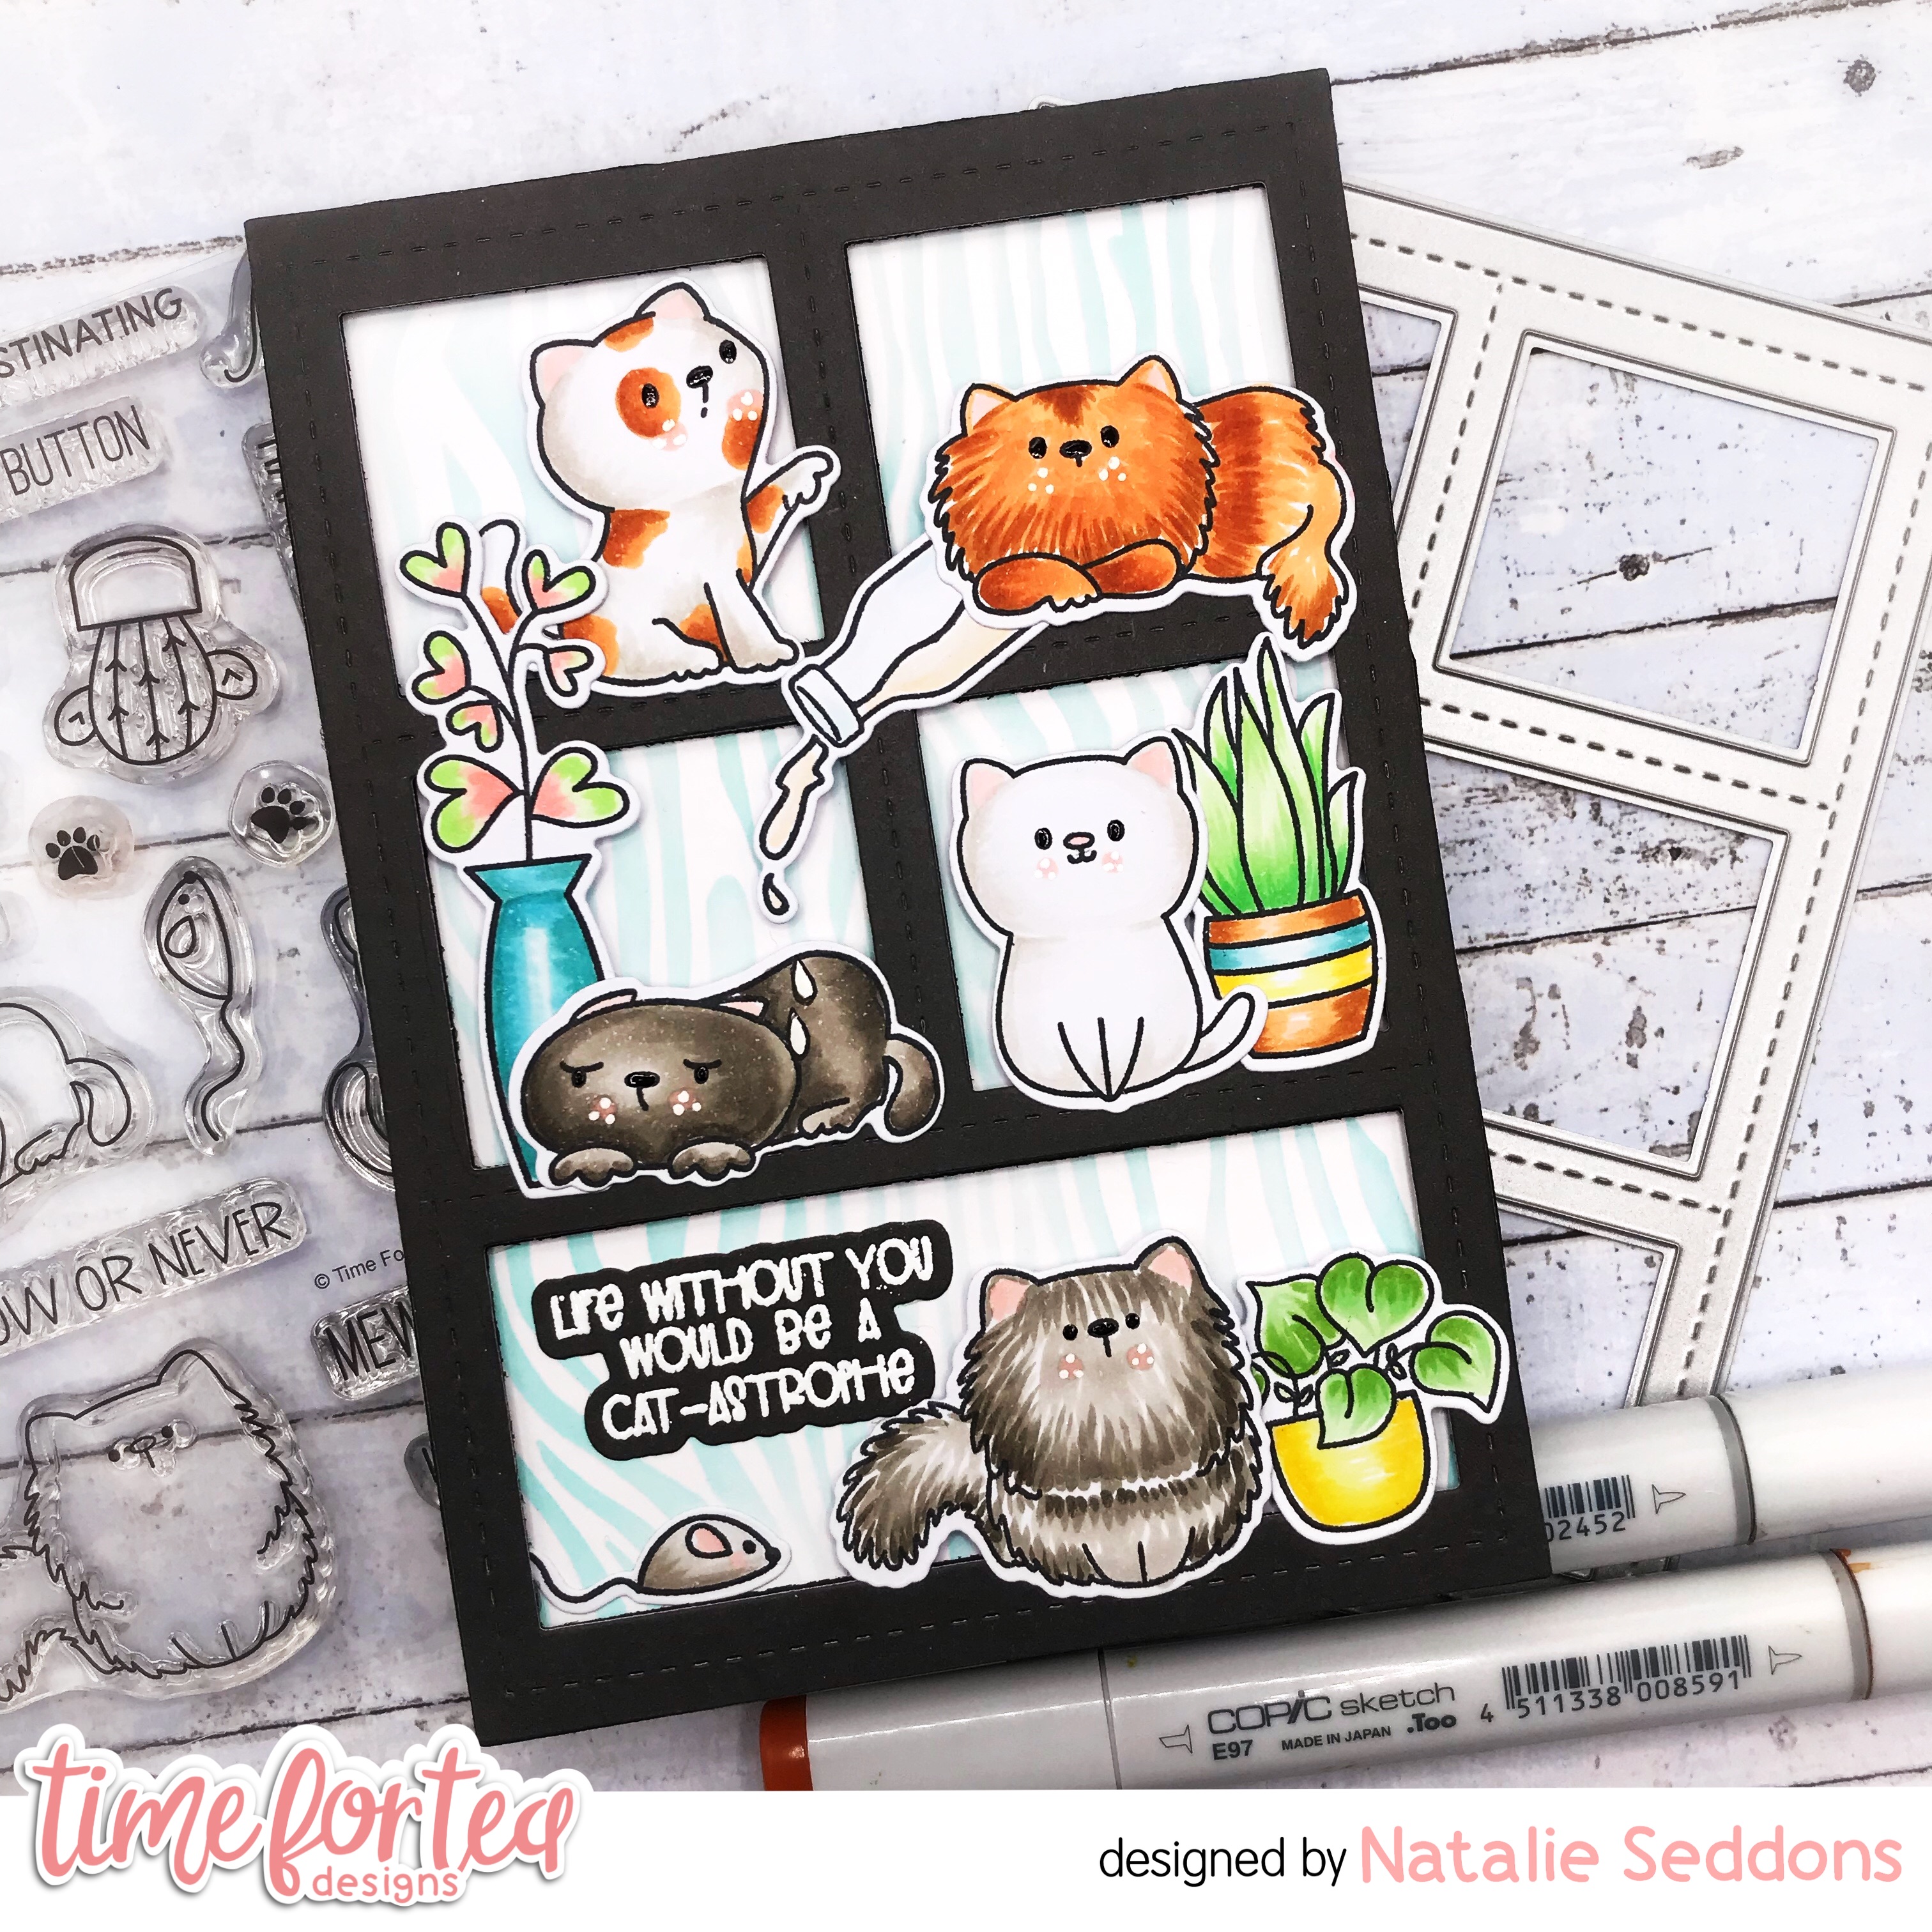
Life without you would be a Cat-astrophe!


 Happy Saturday Teatimer's the new release is finally in the Time for Tea Shop and wow what a release not only in size but in also in cuteness! The cheeky kitties have to be my favourite, so needless to say they were the first ones I coloured up. 

I used the Stitched Window Die to create a shelving unit and added the kitties from the both the Kitty Capers and Purrfect Day stamp and Die sets. I love how the furry ginger kitty is like it wasn't me whilst the other kitty is watching whilst there's milk spilling the milk over that poor grumpy kitty underneath. 
The two stamp sets work so well together but you still have so many images in each set alone to create a super fun scene. Underneath the images I used the new Tiger Stripes stencil to create a subtle wood effect behind. It just gives a little more detail so the background is not so plain but subtle enough to take over the card. 
I hope you like my card for today don't forget to check out the Time for Tea Shop for more inspiration and see the full release and if anything catches your eye you can get 10% off using code T4TNATALIE10. Have a great weekend and happy crafting!


Monday, 14 February 2022

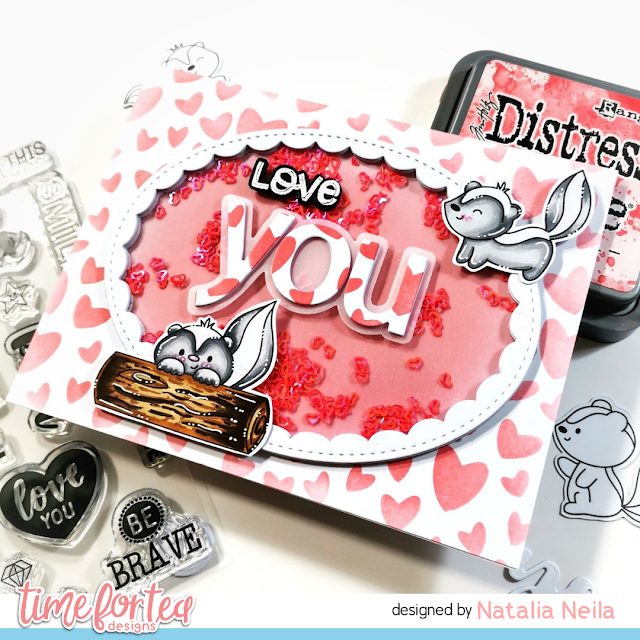
Valentine's card and sale!

Hello and Happy Valentine's Day!

Have you seen the awesome sale at Time for Tea Designs shop? 

For my card, I chose a selection of item which you will find in the Valentine's sale today, so make sure to check them out! The adorable skunks are from the the Stinkin' Cute stamp set which I coloured with my Ohuhu alcohol markers. For the background, I chose to use abandoned coral distress oxide and the Scattered Hearts 6x6" stencil.


Of course I had to make the card into a shaker, didn't I? So I used the Oval Scalloped Nesting Dies for this. I built 5 layers of the frame to ensure my shaker elements could move freely. I then used the 'you' die cut from the Happy Mail Gift Card Holder Add On die set - I love it when word dies come with shadows!

I will post later on my Instagram account later, so keep an eye out for that if you want to see the process!

Sending hugs,

Natalia

Monday, 7 February 2022

Spring bunnies & ink dragging technique

Hello, tea timers!

It is Natalia with you today. 

Today's card features the Blooming Bunnies Clear stamp set and coordinating dies. Don't they remind you of spring? I can't wait for some warmer weather and some sunshine!


I used the polaroid die from the Memory keeping essentials set. I love how cute the bunnies look in their little photo, don't you? The sentiment is from the Creating Memories stamp set, which has lots of different words on it so it's great for both cardmaking and paper crafting. I used kitsch flamingo distress oxide to stamp it. 

To make the background, I used the same distress oxide ink pad and dragged it in half a moon motions onto my A2 panel. So quick and pretty! I used some vellum behind the polaroid opening to mute the background so that the bunnies wouldn't get lost in the background. That is a great top for when you have busy backgrounds and you want your images to stand out!

Finally, I used some Designer enamel dots to finish off the card. I love the colours that come in both, the Sweet Summer and the Summer Haze packs!

I hope you like the card, see you next week for a fun V-Day hop! 

And remember to use the code T4TNEILA10 for a 10% off your shop.

Sending hugs,
Natalia

Monday, 31 January 2022

Coffee & friends!

 Hello, Tea Timers!

How are you enjoying the new release? What is your favourite? 

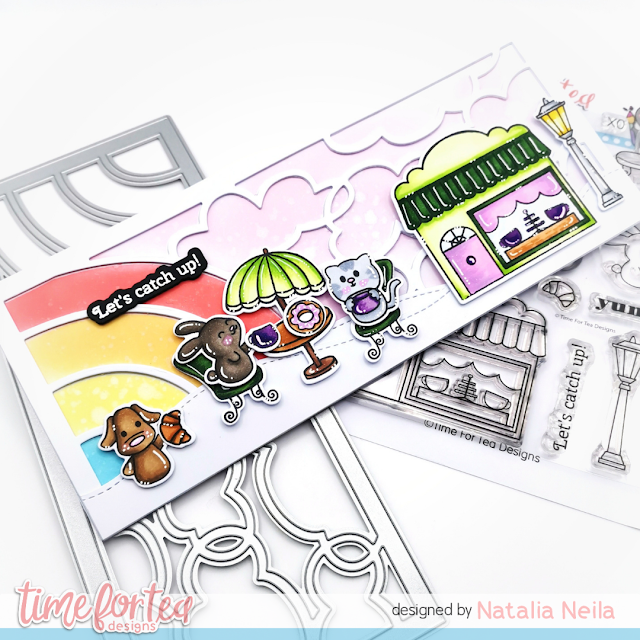
I love it all, but these little guys with their coffee and pastries must be one of my favourites! They are from the Cafe Critters stamp set and coordinating dies.


To make my background, I die cut the Skies the Limit slimeline die from white carstock and used it as a stencil. I ensured that the colours I chose stayed in the sections I wanted by using the negative piece from the die to mask the gaps. You can see the process in my reel here.

Don't they look like they are having the best time? I kind of fancy a croissant now, I must admit!

To get a 10% off your shop, including the new release, use the code T4TNEILA10

Sending hugs,

Natalia

Monday, 13 December 2021

Cosy winter & alcohol inks

Hello, Tea Timers! 

Natalia here with you today. I have a quick card to share with you today.

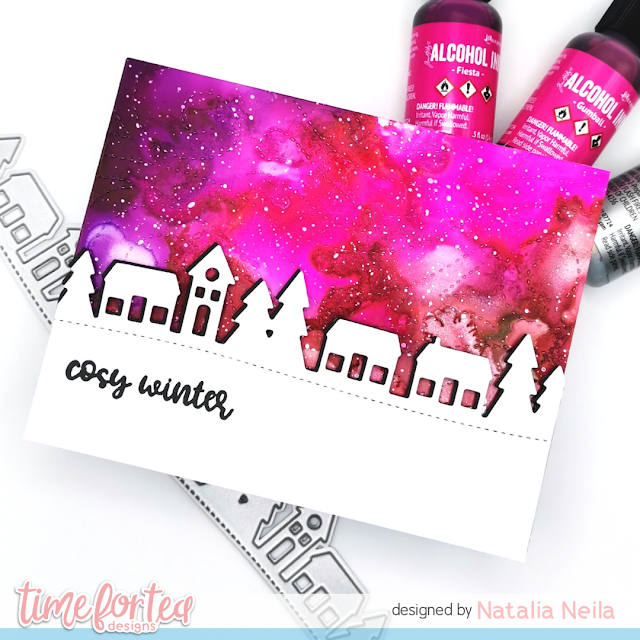
To start with, I made my background panel with alcohol inks. I used Fiesta, Gumball, Boysenberry and Sterling Alloy. I also added some splatters with white gouache.

Once that was dry and ready, I used the Snow Flurry Cover die to give it some texture. I really like this die - it is so beautiful!


The next step was to die cut the Slimline Mini Village die twice, once from black cardstock and once from white cardstock. I stamped the sentiment 'cosy winter' from the A5 Cosy Winter Stamp set twice with Onyx Black Versafine ink onto the front panel.

I glued the black die cut houses behind my white panel to give it some shadow and extra depth - I learned this technique from my lovely friend Raquel who is a master with die cuts! 

I used double sided foam tape to stick the houses onto my alcohol ink background panel, and that's it! That completes this card. 

Do you use alcohol inks often? I certainly want to use mine more!

If you are looking to buy some goodies from the shop, either for you or for a crafty friend, use code T4TNEILA10 for a 10% off your shop!

Sending hugs,

Natalia


Monday, 15 November 2021

Doughnut, coffee & vellum tags!

Hello, Tea Timers! 

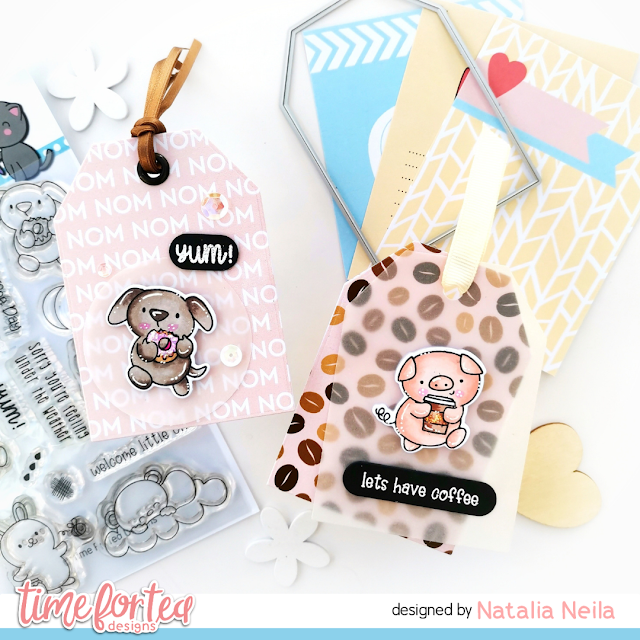
It is DT Natalia with you today. You probably have learned by now that I love making tags! I really like that they are a small project so they feel quicker to make. So I was very happy when I saw the tag die in the new Memory Keeping Essentials die set! 

For the stamps, I decided to use these cuties from the All Occasion set, which I love. Aren't they super adorable?


Instead of making my own background, I chose a couple of papers from the Sweet Summer Journaling cards. I thought the theme was perfect! And the colours are so, so pretty.

I used vellum in two different ways, so that the little guys wouldn't get lost in the background: for the doggy I die cut a circle from vellum and for the piggy I did a whole tag overlay. The way vellum softens the background is so pretty. 

I used a few sequins and a heat embossed sentiment to finish off the tags. These were a quick an easy project, and I hope it inspires you to create! 

Use the code T4TNEILA10 for a 10% off the shop!

Sending hugs, 
Natalia

Monday, 8 November 2021

A fun way to use your washi tapes!

 Happy Monday, Tea Timers!

It is Natalia with you here today. 

Just like with patterned paper, I find washi tape hard to use in my projects, but I always challenge myself to try - and I always love the final results! 

For this 4x4" card, I used a selection from the new Designer Washi Tape collection: Yellow Abstract Triangles, Green Rainbows, Ombre Sunset and Blue Hearts together with the smallest of the dies from the new Memory Keeping Essential Dies.


I started off with a small piece of white cardstock, where I stuck down the washi tapes in different orders. From that piece of cardstock, I then die cut as many little hearts as they fit, and repeated the process until I had 9 hearts. I made sure to move the die cut around so that each heart had a different pattern on it. 

I then die cut 9 hearts from fun foam so stick behind each heart for dimension. 

The sentiment I used is from the Be Kind Be You sentiment set, which I love. I used the coordinating die as well. And finally I added some white and transparent gems and sequins to my little card. 

What do you think? Will you give your washi tapes a go? I hope you do!

Remember to use the code T4TNEILA10 for a 10% off your shop! 

Sending hugs,
Natalia

Other Posts You Might Like