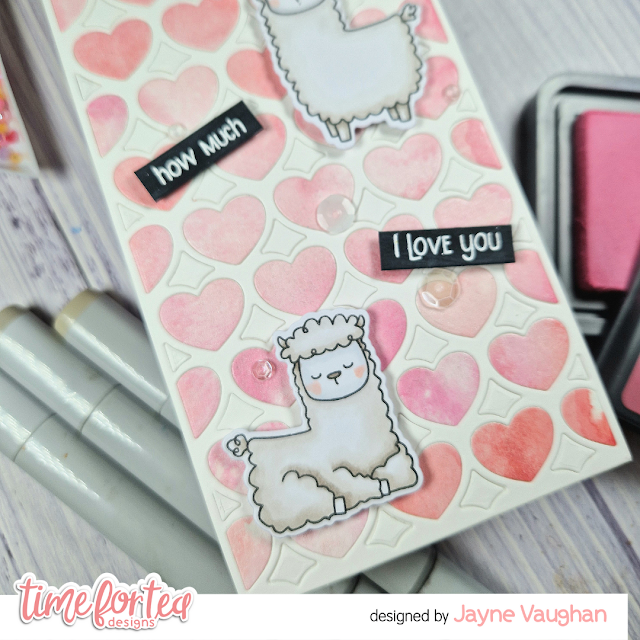
Hey guys, have you finished your Valentines crafting yet? If not, don't worry - I've got a last minute dose of inspiration for you, whether you're celebrating Valentines or Galentines Day! And even better - these cards can be sent year round to your loved one, not just on February 14th. AND you get 2 backgrounds for the price of 1! Ready to craft? OK, let's go!
Supplies used:
- Llama Tell you stamp & die set
- Beach Buds stamp & die set
- Lots of Love slimline die
- Circle dies
- Friend sentiment die
- Shimmer Spray or spray bottle of water
- Distress oxides in spun sugar, kitsch flamingo and picked raspberry
- Copic markers or other colouring medium
- MISTI or other stamping platform
- Die cutting machine
- Liquid glue and foam tape
- Sequins
- Black and white card stock
- Embossing ink, white embossing powder and heat gun
- Glass mat or other slick surface
- Solid stamp
Instructions:
1. We're going to create an ink smooshed background to start, so grab some inks in different shades of pink, and smush them onto a slick surface like a glass craft mat. Spray the inks with water (or you can use shimmer spray like I did, for some extra shine).
2. Dab a piece of white cardstock into the inks. Repeat until you're happy with the effect. You can dry the panel with a heat gun and add more layers if you want to!
3. Once the panel is dry, place the Lots of Love die on to it, and run it through your die cutting machine. Make sure to save all of the little die cut hearts and put them to one side.
4. Take the die cut frame and glue it to a slimline card base. Die cut a circle from pink card using the circle dies and add it to the card panel, about 1/3 of the way down.
5. Stamp the seagull from the Beach Buds stamp set. To make the other seagull, we need to do some mirror stamping. The way I do this is to remove the mat from my MISTI and place a solid stamp in its place (you could also maybe use a gel press or even some acetate). Stamp the seagull image on to the solid stamp. Then, place your paper down over the solid stamp and press into it. When you lift the paper away, you will have a mirrored image of the original stamp.
6. Colour the seagulls with your preferred medium (I used Copics) and fussy cut them out. Add to the pink circle with foam tape.
7. Stamp the "love you" and "you go gull" sentiments from the Beach Buds set, and trim the latter sentiment down to just say "gull". Add them to the card with foam tape.
8. From your remaining ink smooshed background, die cut the "friend" word die, and the shadow die from white cardstock. Layer them together with liquid glue, and add to the card front.
9. To finish the first card, add some gems in co-ordinating colours.
10. For the second card, we need to cut another panel using the Lots of Love die, but this time, out of white cardstock. Glue the frame on to a white slimline card base.
11. Now for the fun part - we're going to do some "die-cut inlay" - i.e., we're going to glue all of the little hearts that we saved earlier into the negative spaces in the white die-cut we just made. Is it time consuming? Yes. Worth it? Definitely. I actually find it quite relaxing, like a jigsaw puzzle.
12. Next, stamp, colour and die cut three of the llamas from the Llama Tell you stamp set. Again, I used Copics here, but you can use whatever you want! I added the llamas to my card with foam tape.
13. Stamp the sentiments "llama tell you" "how much" and "I love you" onto some black card using embossing ink. Heat emboss in white, then trim down the sentiments into three thin strips. Again, add these with foam tape to the card front.
14. I finished with some clear sequins dotted around.
I really love these cards! It's a shame that the photos don't capture the shimmer from the spray - if you check out my Instagram, I'll upload a reel which will hopefully show it better! (@card_days_night).
Thanks for joining me again for another step-by-step tutorial - see you in March!
*Discount code* - use T4TJAYNE10 for 10% off your purchase!


No comments:
Post a Comment
Thank you for leaving a comment, it really does brighten my day!