Pages

Showing posts with label up up & away. Show all posts

Friday, 4 March 2022

Thank you Skunks


DT Annalisa here, wishing you a happy March! Spring is a few weeks away, so I am sharing this bright and cheerful tulip card. I can't wait until my garden starts blooming. As I write this, the snow is falling outside, so I know that we are a long way off from that!


For the middle panel, I used the medium scalloped die to cut white card stock onto which I ink blended Spiced Marmalade, Wild Honey and Squeezed Lemonade Distress Oxide, using my
Beautiful Rainbow Blender Brushes. I added some splatter in Fired Brick Distress Oxide.

For the back panel, I die-cut some white card stock using the largest stitched die from the Slimline Trio Circle Die Set and ink blended on Salvaged Patina Distress Oxide with a blender brush.

The front panel was created by die-cutting white card stock with the tulip add-on die and the smallest stitched die from the Slimline Trio Circle Die set. I added splatters of Salvaged Patina Distress Oxide with a paintbrush. 

I adhered the teal and scalloped panels to a slimline card base with liquid glue. For the top panel, I used foam tape for added dimension.

I used the following stamp sets: Stinkin' Cute, You’ve Got Mail, Mum & Dad, Be Slothy and Up, Up & Away. I stamped, coloured and die-cut the images and the 'thanks' sentiment and then used liquid glue to adhere them to the slimline card. To complete the card, I added some clear gems.


Thank you so much for reading my blog post, you can use my discount code T4TANNALISA10 when you visit the Time For Tea Designs shop to get 10% off your order.


Friday, 7 May 2021

You Are Loved


Happy Friday! DT Annalisa here, sharing a 3D shadow box card featuring several adorable stamps and papers from the new Brighter Days release.

The adorable bunnies are from the Blooming Bunnies stamp set, the grass, flowers and dragonfly are from the Lucky Ducks stamp set, and the sentiment is from the Brighter Days stamp set. There are so many cute creatures and elements in these stamp sets, perfect for creating scenes which I love to do. The bee is from the All Occasion Critters Clear Stamp Set and the butterflies are from Up, Up & Away. I stamped, coloured (with Copics), cut out all of the elements, and set them aside until the card was ready to assemble. 


The clouds are from the Windmill Add On die, I added some Distress Oxide in Speckled Egg to add some colour. The pink and blue die-cut flowers on the top right and bottom left are from the Spring Blooms Dies, they were cut from some pink and blue card stock.

I used my Brother Scan N Cut SDX125e to cut a card base design from Lori Whitlock's SVG Shop which I adapted to create my card. I used the new Brighter Days 6x6' Paper Pad for the pink front panel of this card as it is perfect for a spring card like this. I coloured the tree in the background and flowers and leaves on the front of the card with my Copics. The sky was created using Distress Oxides in Mermaid Lagoon and Broken China with my Beautiful Rainbow Blender Brushes.


Once the card was assembled, I added all of the elements with liquid glue. I also added the 'you are loved' sentiment to the front of the box card with glue.

These types of cards take me several hours to create but I love doing them, so I hope you enjoy seeing and reading about them!

Thank you so much for visiting the blog, you can use code T4TANNALISA10 when you visit the shop to get a 10% discount on your entire order.


Friday, 30 April 2021

Paper Hugs Enclosed


Happy Friday, DT Annalisa here sharing a shadowbox card featuring some older Time For Tea Designs products, as well as the new Brighter Days 6x6' Paper Pad. This is such a beautiful paper pad with so many terrific patterns.

To start, I used my Brother Scan N Cut SDX125e to cut a card base design from Lori Whitlock's SVG Shop (shadowbox card front flap hedgehog), which I adapted to create my card. I used several Time For Tea products for the inside of the card, including Up, Up & Away, Treat Yourself, Windmill Add On die, Happy Mail Critters, Mum & Dad Coordinating Die set.


I stamped, coloured (with Copics) and die cut the critters and other elements. For the fence and pots, I used some grey paper (fence), patterned paper (from the new release) and Distress Oxide in Mowed Lawn (green bush top). I assembled the inside of the card first, starting with adding the fence, grass (which I stamped the sentiment on) and pot, which I adhered to the card using liquid glue. Next, I added the hot air balloon bunnies, followed by the mouse, worm, flowers and die-cut heart. To finish off the inside, I added the clouds, the bee and the butterflies.
 

I cut out the beautiful pink bee patterned paper with the A2 Nesting dies and placed it on top of the blue card base for the front of my project. I stamped and coloured the bunny in the hot air balloon (with some masking to remove the second bunny) from the Up, Up & Away Clear Stamp Set. I cut it out and glued it to the patterned paper as well as some white puffy clouds. I also used the other bee from the All Occasion Critters Clear Stamp Set. 


I die cut the Paper Hugs Sentiment Die from some white card stock and used liquid glue to adhere the 'paper' sentiment to the patterned paper. To complete the front of the card, I stamped and die cut the 'Hugs enclosed' sentiment using the Be Kind Be You Clear Stamp Set and the coordinating dies.

Use code T4TANNALISA10 when you visit the shop to get a 10% discount on your entire order.


Friday, 16 April 2021

Springtime Friends


Happy Friday everyone, DT Annalisa here today. Spring is one of my favourite seasons; I love the longer days, plants peeking out of the ground and the budding trees. For today's project, I used several Time For Tea Designs goodies to create this adorable interactive spring scene.

To create the card, I used the following stamp sets: Happy Mail Critters, Be Slothy, Treat Yourself, Up, Up & Away, All Occasion Critters, Life's Ups & Downs, Skating By Penguins, Be Kind Be You and Happy Mail Critters Digi Stamp Add On Collection. I stamped (or printed), coloured (with my Copics), and cut out the images, and set them aside to add to the card later.


I created the background using Tumbled Glass and Moved Lawn Distress Inks, my Beautiful Rainbow Blender Brushes and the Scene It 6x6” Stencil. I added some water droplets as well as some glitter mist that I had in my stash. Once the panel was dry, I die cut it using the Lift The Flap Slimline Add On Die and the Slimline Scalloped Trio Circle Nesting Dies.

For the inside, where the flap opens up, I created a second panel with the same Distress Inks and stencil. I added some foam tape to the lift the flap panel and adhered it down to this inside panel. I then added them both to a slimline base which I die cut with the Slimline Scalloped Trio Circle Nesting Dies.


Then it was time to get to work on gluing down all of the adorable elements to the card. I stamped the 'hello' sentiment, inside the middle flap. I have to say, I just love the little bees that are in the All Occasion Critters stamp set, I get so much use out of them as cute little additions to my scenes.

I hope you like this card and would love it if you could use T4TANNALISA10 for 10% off your order the next time you purchase anything from Time For Tea Designs.


Thursday, 8 April 2021

You Are Awesome

Hello crafty friends, Kitty here with my usual Thursday afternoon post. I am still loving these cuties from the Up Up Away Set so I had to make another card with them! This time a slimline card...

For this card I used Time For Tea Up, Up & Away Stamp Set. I coloured all the images with copics and fussy cut them out. I created the background by die cutting the clouds from the Landscape Edge Dies and using it as a stencil. I also used the same die set to create the grass hills. I used blue and green distress oxides. I also added the layered sentiment using the You Are Awesome Sentiment Dies. I added some spots to the hot air balloon with a white pen. I added some Clear Drops to finish.

Thank you for stopping by today. I will be back next Thursday with another creation. Don't forget to pop by tomorrow for more inspiration from the team.

Please feel free to use mmy discount off your purchases at the store, it's T4TKITTY10

Kitty xx

Friday, 2 April 2021

Hoppy Easter


Happy Friday! DT Annalisa here and today I am sharing an Easter card that I created using the FREE Easter Basket Digi Stamp Collection and coloured with coloured pencils and not Copics! EEK.

My usual go colouring medium is always my Copic Sketch markers, but I decided to try giving coloured pencils a try for a change. The look isn't as smooth as it is with Copics, which is why I don't typically reach for my colouring pencils, but I am happy with the way it turned out.


I used some older stamp sets to complete the scene, All Occasion Critters Clear Stamp Set (bunny and bees), Beavering Away (duck), Up, Up & Away Clear Stamp Set (butterfly) and Hip Hop Horray (larger butterfly).

After colouring the scene with my Prismacolor coloured pencils, I cut it out using one of the Circles of Love Nesting Dies. I used the same die set to die-cut some of my Rainbow Brights Essentials 6x6 paper pad to use as the background panel for the card. 

I cut the card base out from some heavy-weight white card stock and adhered the patterned paper to it with liquid glue. I used foam tape on the back of the scene and placed it on the card base and patterned paper.

If you are interested in purchasing any T4T products, use T4TANNALISA10 at checkout for a 10% discount which can be used on anything, anytime and has no time limit.


Thursday, 1 April 2021

Hang In There Bunnies

Hello, Kitty here. I am delighted to join the Time For Tea Design Team and this is my first post - eeek! I have had so much fun behind the scenes creating so watch out for my weekly posts. So here is my first card...

I will apologise for the photo, it was a tricky lighting/weather day. I will try and retake it if I can. So I decided to use the Time For Tea Up Up & Away Stamp Set as, well they have such cute bunnies! I coloured them with copics and fussy cut them out. I created a blended background using my distress oxide Inks. I used Time For Tea Landscape Edge Dies to create the die cut clouds. The stamped clouds and sentiment are also in the same stamp set. I finished by adding some Rain Drops Embellishments.


Supplies;
Time For Tea Designs Stamps - Up, Up & Away
Time For Tea Designs Dies - Landscape Edges
Time For Tea Designs - Iridescent Rain Drops


Please do use my discount code T4TKITTY10 to ensure you receive 10% off your order :)


Thank you for joining me today and I will be back next week with another creation.

Kitty xx

Thursday, 24 December 2020

Thank You Scene Card

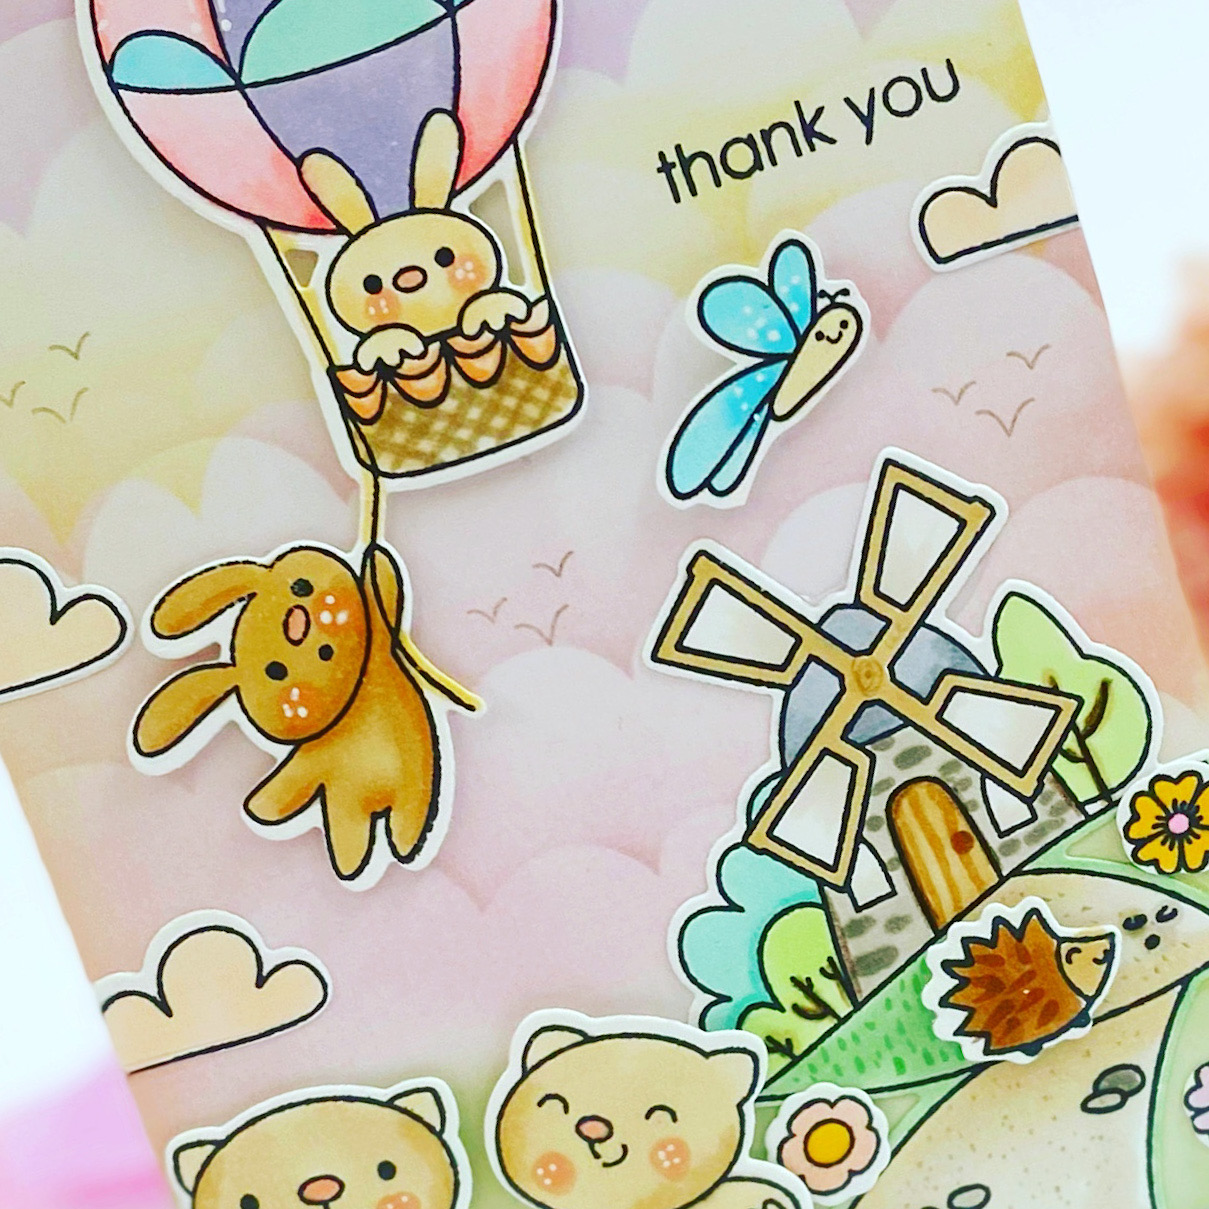
 Hello Vic here today. I’m sharing with you a really sweet card I made using the Up, up & Away stamp set. I love this stamp set as it has the cute bunny in the hot air ballon and the windmill. 


To make my card I wanted to create a pretty sky so I used the Scene It Stencil  along with some pretty soft distress inks and my Beautiful blending brushes. I added some green ink to the bottom of the card to look like grass. 


I then stamped my Up, up & Away stamp  images and I also used the clouds from the Buzzing For You Stamp Set and coloured them in with a light peach colour. I then stamped some flowers and added a hedgehog from the Life’s Up’s and Downs Stamp Set


I used my copic markers to colour the images in and my Coordinating Dies and run them through my die cutting machine. Once all my images are die cut I adhered the ink blended panel to my card base and started to adhere the images onto my card using foam tape. I then wanted to add another critter to my card and I stamped a dragonfly and some cute cats from the Crafty Cats Stamp Set and adhered this down. For my greeting I used the thank you sentiment stamp from Fairy Garden Stamp Set.


I love how this turned out and I think they look so cute all together on the card. I hope you feel inspired to mix up your stamps and make some cute scenes. It’s really fun to do even though the colouring took a little while it’s so worth it. Another tip I have is sometimes I stamp lots of images together and colour them and I keep them in a clear plastic sleeve to use on my cards. That way you can make your cards a bit quicker if you needed to. 

Don’t forget you can save 10% off your order using the code: T4TVICKI10 at the checkout. 

Thanks for stopping by today!

Vic 

Thursday, 5 November 2020

A Card Full Of Critters


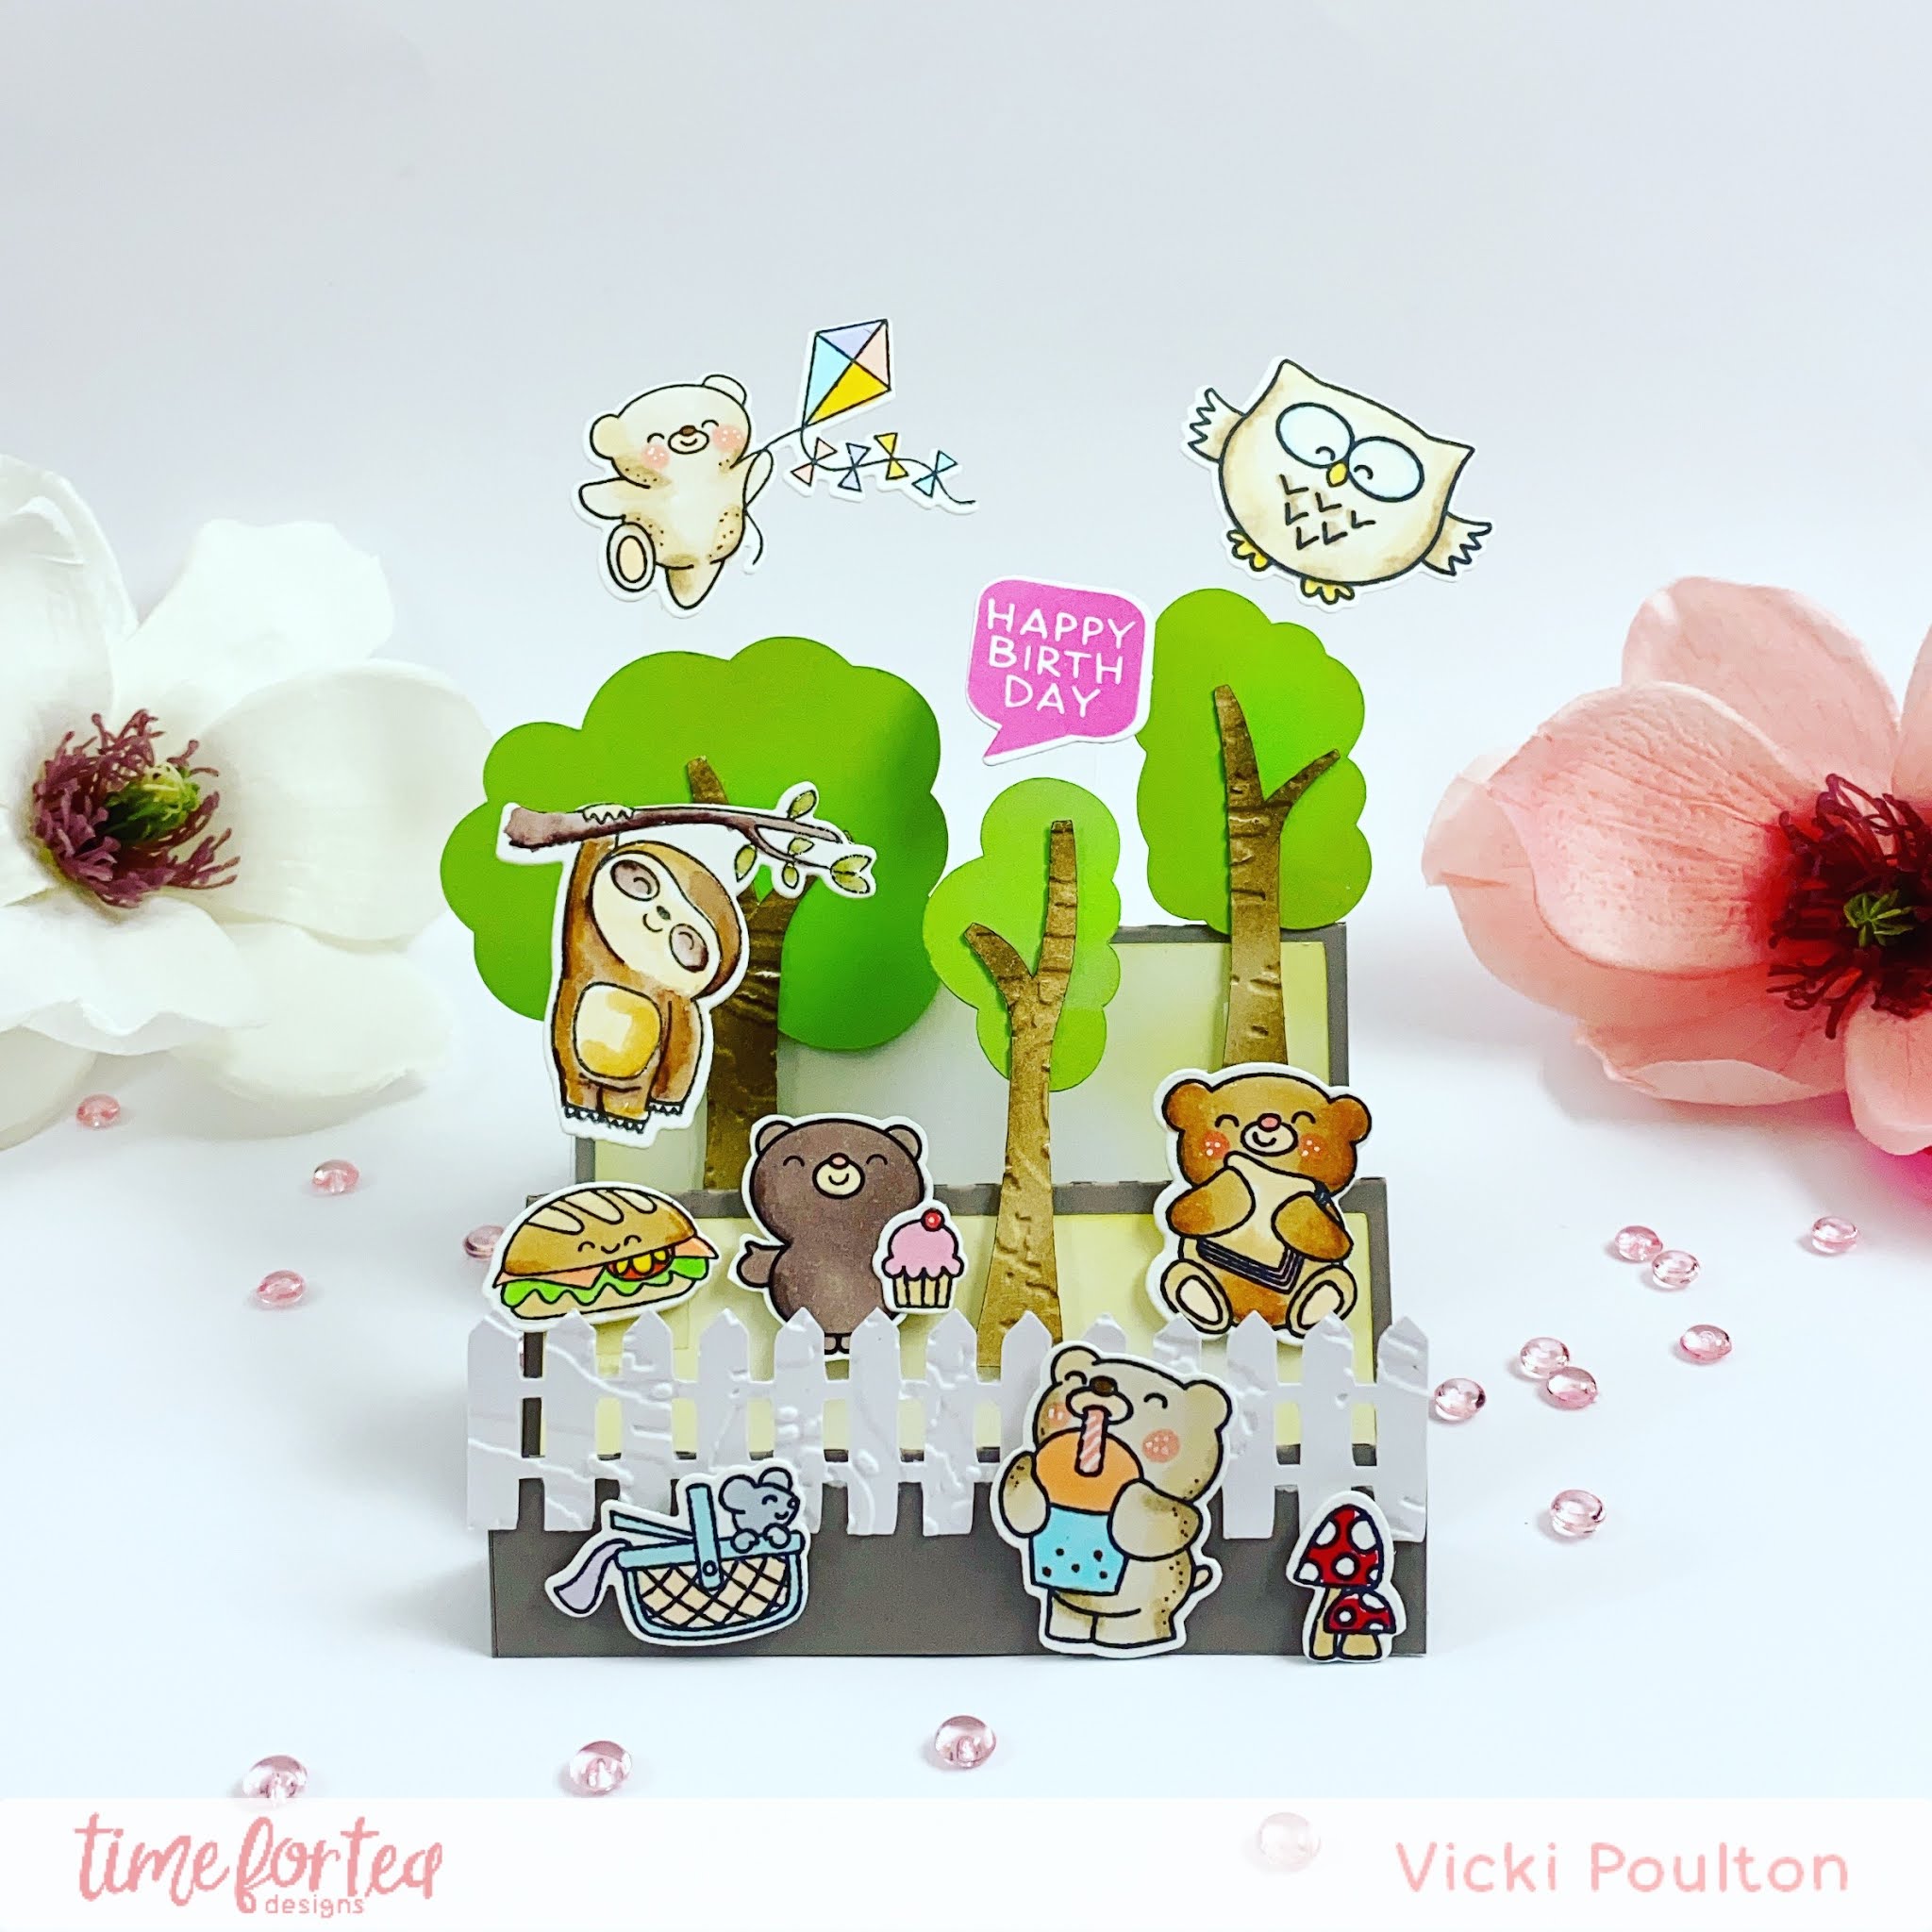
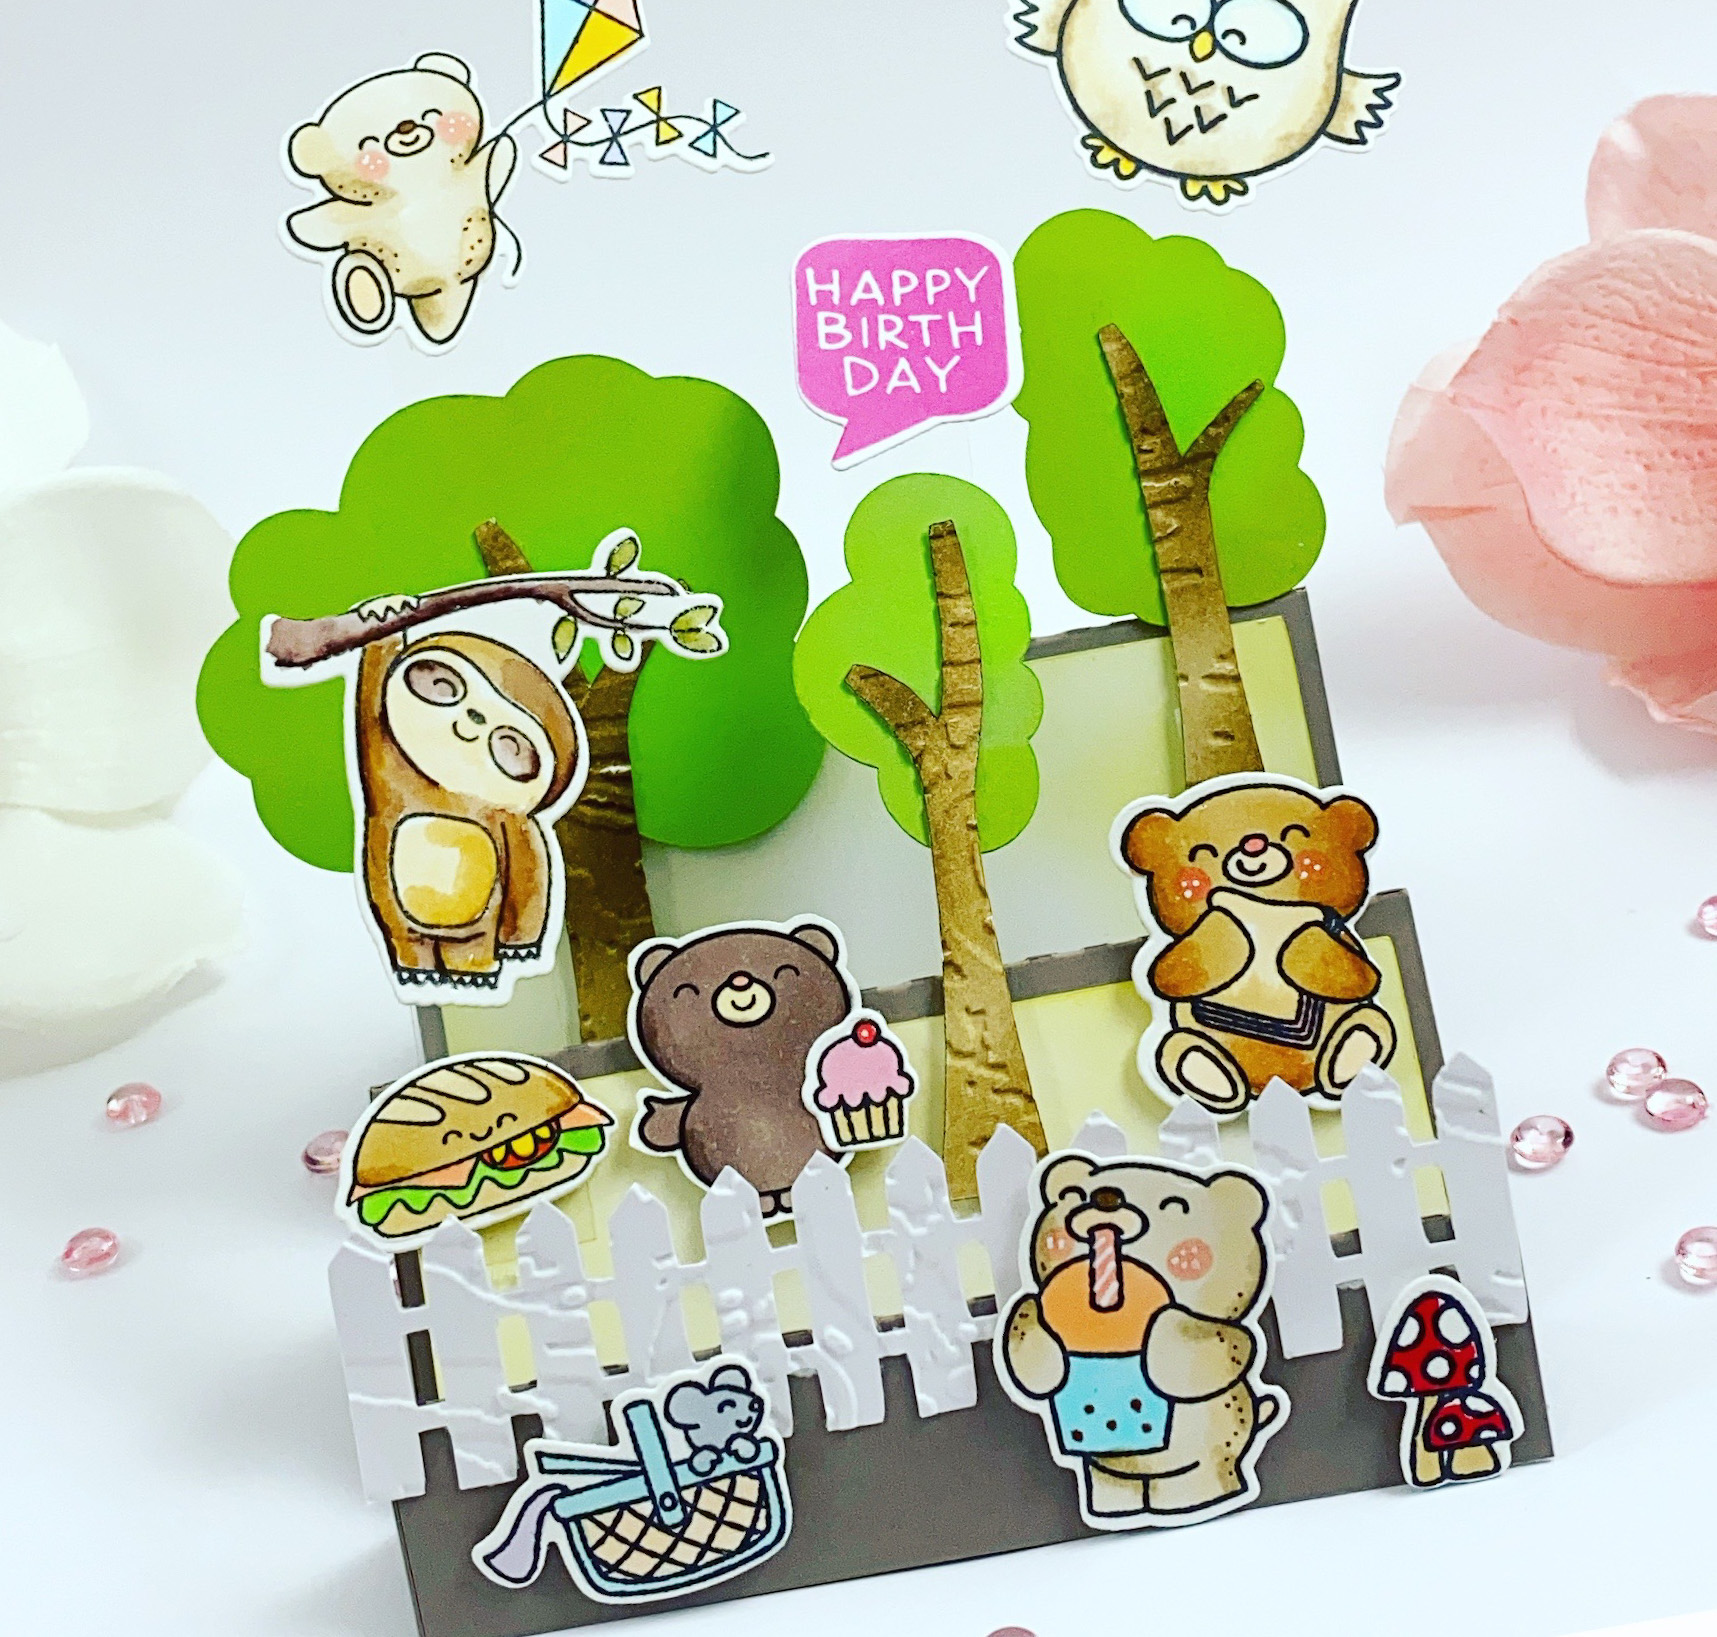
Hello Vic here today! I wanted to make a card that’s crammed with cute Time For Tea Designs images. The best way for me to do this was to use a stepper card. 


I cut my card using a silhouette machine along with the trees and started to put the card together. Once my stepper card was completed I started to stamp my images. I used Be Slothy Stamp SetSpeech Bubbles Stamp Set , Treat Yourself Stamp SetUp, Up & Away Stamp SetBearing Gifts Stamp Set ,Bears Picnic Stamp Set and the Be Owlsome Stamp Set. Once my images were all stamped I coloured the images in with my copic markers. Using the coordinating dies I then ran them through my die cutting machine. 

Next I used the Windmill Add On Die and using the fence die and some white card I ran this through my die cutting machine and adhered this onto the first fold of the stepper card. I then added some images to the card  using foam tape. For the owl, bear with a kite, sloth and greeting I added some acetate to the images and adhered them into my card to make it look like the images are floating. 


I loved how this card turned out and it’s fun to make too! You can use any stamps for this design I thought it would look really cute using the chosen images. 

Thank you so much for stopping by today! Don’t forget you can save 10% off your order using the code:T4TVICKI10 at the checkout. 

Have a wonderful day!

Vic


Other Posts You Might Like