
Hi Tea-Timers! Sorry this month’s tutorial blog is coming to you a little later than usual, unfortunately my own little teaspoon has been quite poorly (but is hopefully on the mend now!).

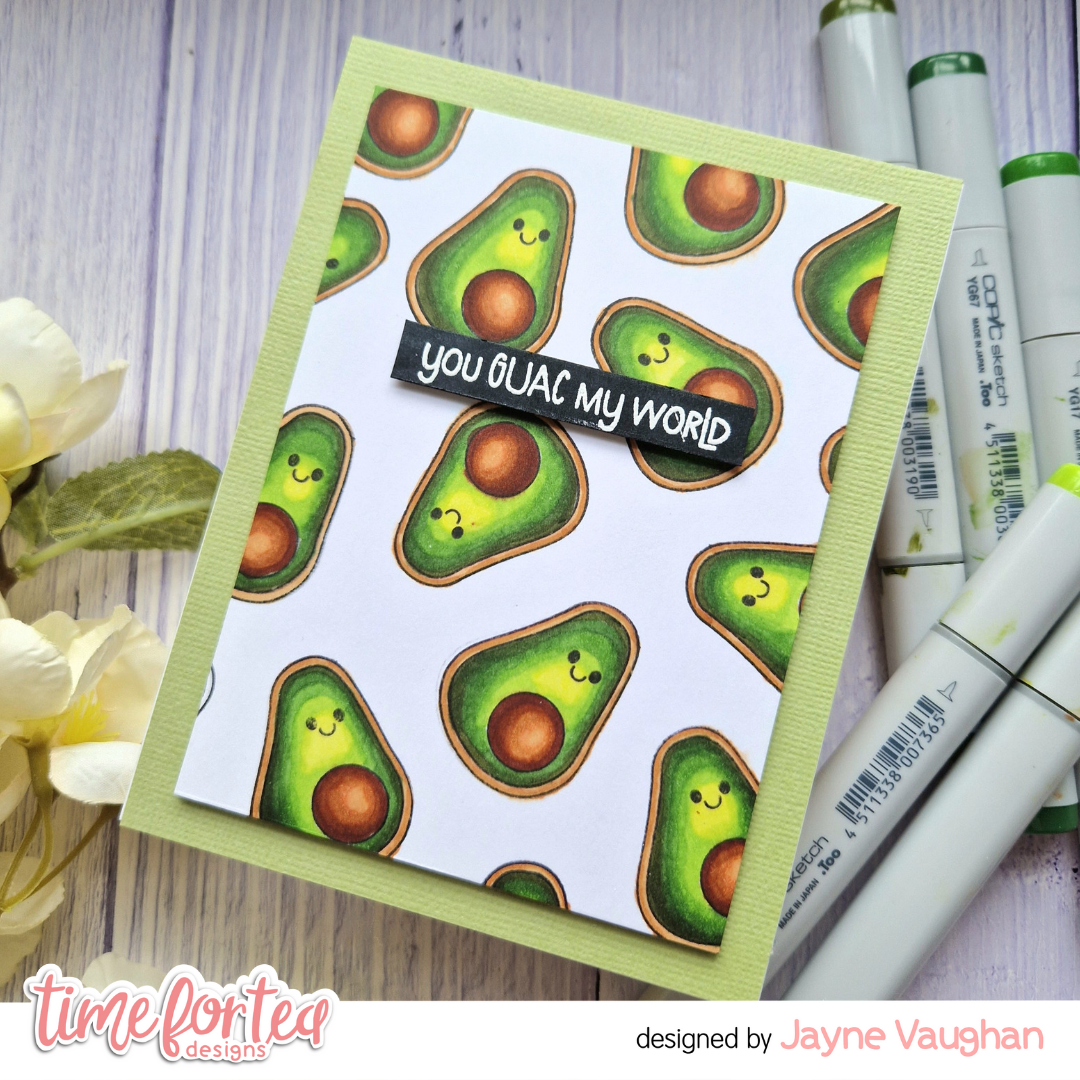
This month, we’re looking at how to create a card background
using just one image. I love the bold, graphic look that this creates, and it
makes for a fairly quick card, too!
First off, these are the supplies you’ll need:
- “Let’s Spoon” stamp set
- Wow Embossing Super Fine Bright White embossing powder
- Versamark embossing ink
- Heat gun
- Pistachio Green cardstock from Tonic Studios
- Neenah Classic Crest white cardstock, 110lb
- Black cardstock from Time for Tea Designs
- Scotch 3M foam tape
- Gina K Onyx Black Amalgam ink
- Copic markers (listed out below)
- X Cut non-stick scissors
- Tim Holtz guillotine
- Mini paper trimmer from Time for Tea Designs

Instructions:
- Cut a panel of white card to US A2 size (5.5” x 4.25”)
- Place your chosen image onto an acrylic block [TIP: stamp the image out a few times on some scrap paper first to make sure the stamp is seasoned and will produce a nice, crisp image! The first few goes with a stamp can be a little patchy!]
- Use some Copic-friendly ink to stamp the image on your page
- Stamp the image repeatedly over the page – I changed the direction of my image to help nestle the images together, and also to create a whimsical look. [TIP: have some images falling off the side of your page, too, as this creates a more cohesive background]
- Colour your images with your chosen medium. I used Copics for mine, and the colours I used are set out below:
- You can choose to use the entire panel and place it straight on to an A2 card base, or trim it down and place it on a co-ordinating card base. I trimmed mine by just over ½” from each of the length and width (if you watch the video, you’ll see why!)
- Add the panel to your base with foam tape, then add the finished panel to a card base with tape runner.
- Grab some black card stock and dust it with anti-static powder. Stamp out your sentiment in embossing ink, then add white embossing powder over the top. Heat set with a heat gun.
- Add the sentiment to the card panel with foam tape.

This is such a good design to use with any small image, but I think the more graphic/clean the better – all of the images in the Let’s Spoon stamp set are perfect for this, but you can use any! I’d love to see what you create, so if you’re inspired by this, please do share your creations on social media and tag us so we can see!
Don’t forget to use discount code T4TJAYNE10 to get 10% off your purchase!
Have a wonderful crafty month... until next time!


No comments:
Post a Comment
Thank you for leaving a comment, it really does brighten my day!