Hi friends and welcome back to the blog.
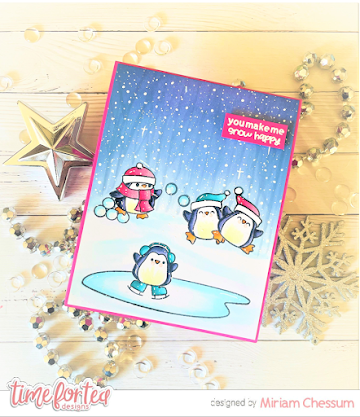
DT Miriam here and I am delighted to be here for my first design team post for Time For Tea Designs. Where better to start my design team journey than with a Christmas card, it's never too early to make Christmas cards, right? Today it's all about penguins and snow ball fights, so lets get started.....
On the white panel I stamped out three images from the Skating By Penguins stamp set - the ice skating penguin, the penguin throwing the snowballs and the penguin furthest to the right. Now for once of my favourite crafting things to do - masking!! I made masks for these three images, popped them into place and moved on to stamping the rest of the images. I removed the masks and everything was ready to colour.
To colour the images I chose to use Copic markers. Today I have used the following colours:
Yellows - Y000, Y00
Teals - BG49, BG45, BG01
Reds - R30, R85, R83, R81
Blues - B60, B0000, B000
Oranges - YR07, YR04, YR02
Purples - BV29, BV25, BV23
Greys - C3, C2, C1
I mixed some white gouache with a tiny amount of water and flicked it all over the panel to create a snow effect. Once it was dry, I applied another layer of flicking, then filled in any gaps with white gel pen.
That completes the card for today. I hope you love the card as much as I do and that you may be inspired the get started on your Christmas cards. Don't forget to visit the Time For Tea Designs shop and use my code T4TMIRI10 for 10% discount.
Thanks again for visiting today x


No comments:
Post a Comment
Thank you for leaving a comment, it really does brighten my day!