Hello Teatimers!
It is DT Natalia with you here today. It is bank holiday Monday here in the UK and I hope you are having a fantastic day.
It is also time to show you one of the many cards I made with some of the NEW RELEASE products! Did you watch the new release reveal party FB lives? They were so much fun! I'll link them up here for you in case you missed it and want to watch the replay!
Day 1: click here
Day 2: click here
I am really, really excited about this new release, it is loaded with SO much cuteness! Check it out here: https://timeforteadesigns.co.uk/
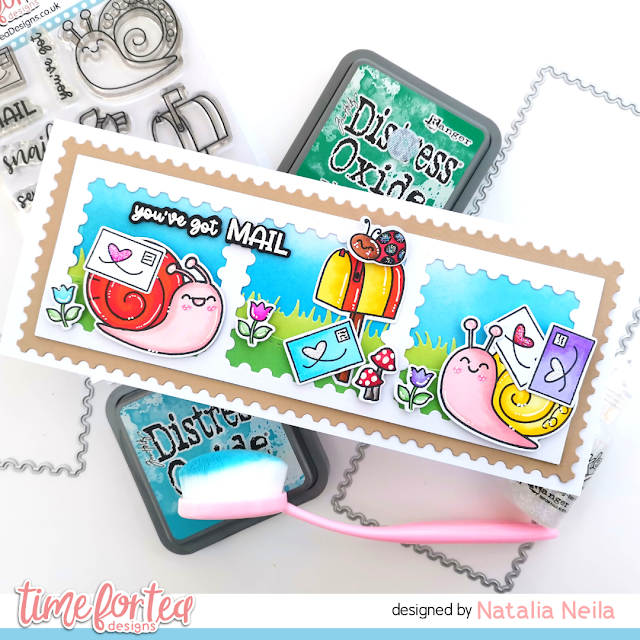
For today's card, I used the You Got Mail stamp and coordinating die cuts as well as the Slimline postage stamp frame dies for by background.
To start with, I used the plain rectangle from the Slimline postage stamp frame dies to cut two pieces of white cardstock - these will be for my grass and sky behind the frames. Using my Beautiful Blender Brushes, I used Salty Ocean and Broken China for the sky and Mowed Lawn, Lucky Clover and Twisted Citron for my grass panel.
Next, I used the hillside and grass dies from the new Slimline hillside scenes dies set to cut my green panel into two sections so that I could layer them up, to add some dimension to the background. I also prepared both my slimline cardbase from white cardstock and my postage stamp outer panel from a light brown cardstock.
OK now, I am a bit of a neat freak, and those three postage windows obviously had to line up perfectly - so I made myself a template! I calculated where each square should go so that it was equidistant from each border and between themselves, cut the square with a craft knife and then used that panel as a guide to position my individual postage square frame dies (I used the large one from the set). Do message me if you want more details on this! But I can tell you - they are perfectly aligned ☺ I would also love to know whether you are the kind of person that makes templates for die cutting and stencilling? or do you just eyeball it? Leave me a comment down below!
My panel is now ready, and the next thing to do was stamp the you got mail stamps (multiple times to save myself time) and colour them. I used my Spectrum Noir markers and the colours are listed here:
Snail 1: PP1,PP2, PP3, AP1; PP5; CT1, CT3, CT4
Snail 2: PP1,PP2, PP3, AP1; PP5; OR2, CR9, CR11
Tulips: BTs, BPs, HBs, LGs
Envelopes: BTs, HBs, DRs and BPs and stickles
Post box: CT1, CT3, CT4; OR1, OR3 and OR4
Ladybird: TN1, TN2, TN3; DR1, DR3, DR5; true black and stickles
Mushrooms: DR1, DR2, DR4; BG2, BG3, BG4, BG7
Do remember to use my code for a 10% discount when you check out the new release! T4TNEILA10
Have a lovely week & see you next Monday!
Natalia x


No comments:
Post a Comment
Thank you for leaving a comment, it really does brighten my day!