
Well, it's the final Step-By-Step of the year, Tea-timers! I hope you are all getting into the festive spirit and are enjoying making some Christmas cards and crafts.
I have made lots of cards with the latest release, in particular the house dies and the Daschunds have my heart this Christmas!
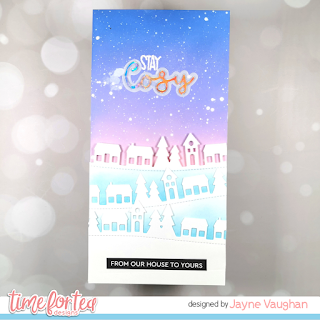
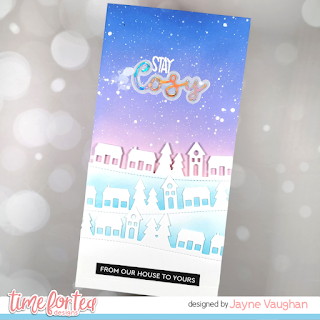
So, for this month's tutorial, I'm going to show you how to make this slimline festive scene. It's a good one for those of you who don't love colouring, as it involves just die-cutting and ink blending.

You'll need:
- Blender brushes
- Your choice of inks (I used the following shades of Distress Oxide: spun sugar; shaded lilac; broken china; blueprint sketch)
- Liquid glue and/or tape runner
- White and holographic cardstock
- Vellum
- Jumping for Joy stamp set
- White embossing powder and heat gun
- White gouache or paint, paintbrush, acrylic block
- Pre-printed sentiment strips
Instructions:
1. Make a slimline card base measuring 8" x 4" from white cardstock and a 8x4" white card panel.
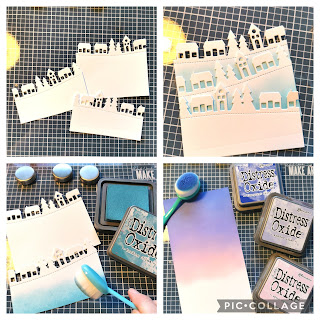
2. Die cut three sets of houses using the slimline village die, each one 4" wide, at three different heights (mine were about 2, 3 and 4 inches tall).
3. Use your blender brushes to apply broken china Distress Oxide on the two tallest die cut pieces, just below the level of the houses.
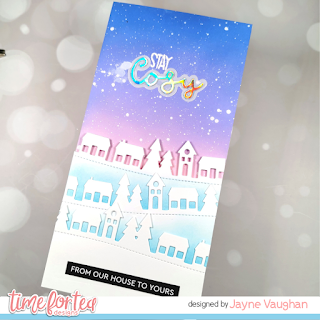
4. Adhere the three die cuts together, so the houses form three rows, about an inch apart.
5. Use your blender brushes to ink blend the sky background - spun sugar at the base, moving into shaded lilac, and then blueprint sketch at the top.
6. Adhere the rows of houses to the bottom of the card with tape runner.

6. Apply a blob of gouache or white paint to an acrylic block, and add water to loosen it. Using a paintbrush, flick the paint onto the background to create a starry background.
7. While the background is drying, die cut the word "cosy" from holographic card, and the shadow from vellum (I didn't use the stitched shadow for this card). I actually used adhesive vellum which is a genius invention, as you don't need to worry about the glue showing through! Adhere the two layers together.
8. On the sky background, heat emboss the word "STAY" from the Jumping for Joy stamp set, and adhere the "cosy" die cut underneath.
9. Finally, trim down a sentiment label and add to the bottom of the card with foam tape.
I hope you've enjoyed this tutorial!
If you'd like to buy anything from the TFTD store, don't forget that discount code T4TJAYNE10 will get you 10% off your entire purchase.
Have a lovely Christmas & I'll see you in 2022!


No comments:
Post a Comment
Thank you for leaving a comment, it really does brighten my day!